Tag: simple crafts

  • What is Collage?

    What is Collage?

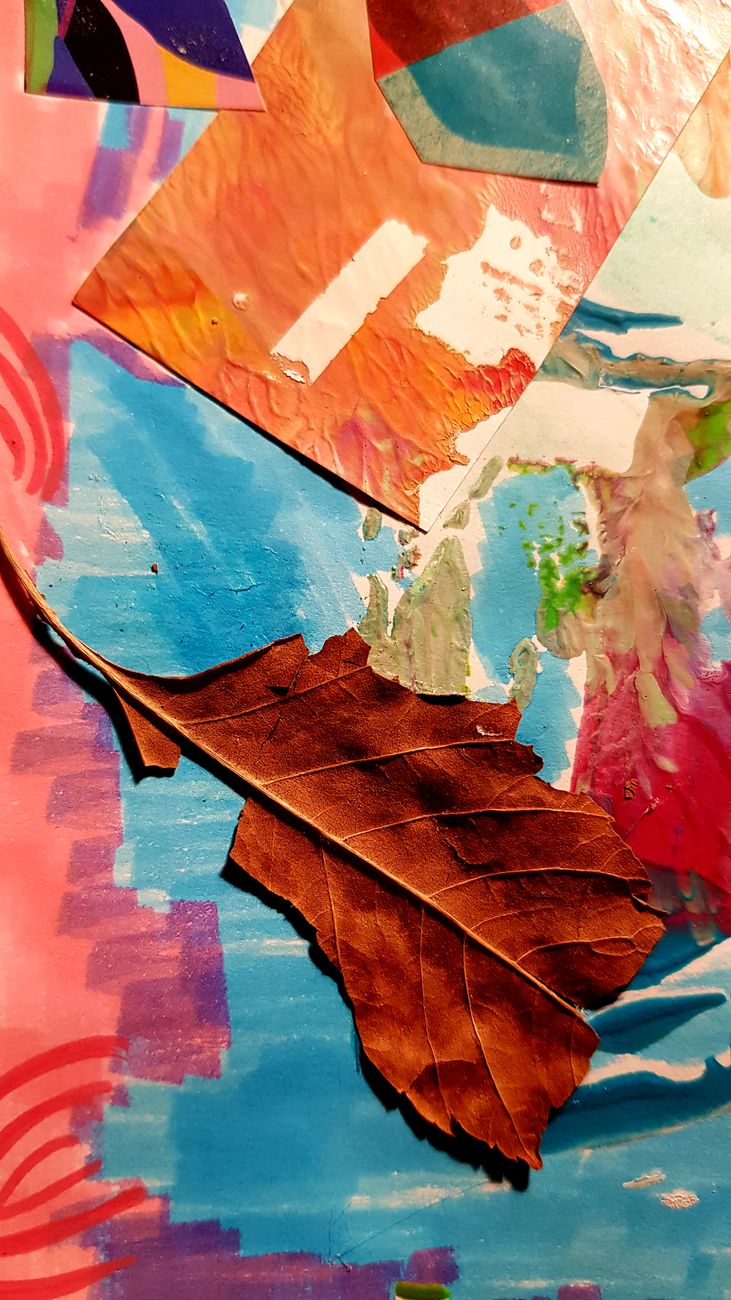
    Collage is a craft and art technique where different materials are cut, arranged, and stuck onto a surface to create a new design. These materials might include things like paper, photographs, magazine cuttings, fabric, card, tickets, labels, wrapping paper, or other flat items.

    Collage is a good craft for beginners because you don’t need to be able to draw perfectly or use complicated tools or techniques. You can start with paper, scissors, glue, and a piece of card.

    How Does Collage Work?

    Collage works by layering and arranging different pieces together. You might cut out shapes, tear paper by hand, place images next to each other, or overlap materials to create texture and interest.

    The process usually involves three main steps:

    1. Choose your materials.
    2. Arrange them into a design.
    3. Glue them down.

    Some people plan their collage carefully before committing anything to paper. Others work more freely and build the design as they go along.

    What Can You Make With Collage?

    Collage can be used for many creative projects, including:

    • Greeting cards
    • Scrapbook pages
    • Journal pages
    • Wall art
    • Mood boards
    • Vision boards
    • Bookmarks
    • Gift tags
    • Mixed media artwork
    • Handmade posters
    • Decorations
    • Notebook covers

    Beginners often start with small projects, such as a card, journal page, or simple picture, because these are easier to finish than a large piece of artwork.

    Is Collage Good for Beginners?

    Yes, collage can be a great choice of hobby for beginners. It is flexible, forgiving, and doesn’t require specialist art skills.

    If you decide you don’t like how something looks, you can move the pieces around before gluing them down. You can also layer more paper over an area if you want to change the design.

    Collage is especially good if you enjoy colour, texture, paper crafts, journaling, scrapbooking, or using up leftover materials.

    What Do You Need to Start Collage?

    To start collage, you only need a few basic supplies:

    • Paper or card
    • Scissors
    • A glue stick or craft glue
    • Old magazines, paper scraps, or printed images
    • A pencil, if you want to plan out your design first
    • A ruler to make straight edges

    You can also use items such as:

    • Washi tape
    • Stickers
    • Patterned paper
    • Fabric scraps
    • Stamps
    • Buttons
    • Ribbon
    • Paint
    • Markers
    • Old book pages
    • Tissue paper

    Keep in mind that you don’t need all of these at the beginning. A simple collage can be made with paper, scissors, and glue.

    What Materials Can You Use for Collage?

    Many materials can be used in collage, especially flat or lightweight items.

    Common collage materials include:

    • Magazine cuttings
    • Photographs
    • Coloured paper
    • Scrapbook paper
    • Wrapping paper
    • Newspaper
    • Old book pages
    • Tickets
    • Receipts
    • Labels
    • Maps
    • Postcards
    • Fabric scraps
    • Tissue paper
    • Dried leaves or pressed flowers

    If you are making a collage in a journal or on a card, avoid anything too bulky. Heavy items may not stick very well or may make a book difficult to close fully.

    Is Collage the Same as Scrapbooking?

    Collage and scrapbooking are related, but they are not exactly the same thing.

    Whilst collage is a general art technique that uses cut, torn, or layered materials to create a design, scrapbooking is usually more focused on preserving memories, photographs, events, and other keepsakes.

    A scrapbook page may use collage techniques, but not every collage is a scrapbook page. Collage can be abstract, decorative, personal, artistic, or experimental; whatever takes your fancy!

    Is Collage Expensive?

    Collage can be very inexpensive, as you can use materials you already have at home, like old magazines, packaging, wrapping paper, envelopes, and paper scraps.

    It can become more expensive if you decide to buy specialist scrapbook paper, stickers, stamps, cutting tools, or mixed media supplies, but these are optional.

    A good beginner approach is to start with recycled paper and basic glue before investing in lots of extra materials and supplies.

    Is Collage Messy?

    Collage can be quite low mess, especially if you use a glue stick and paper scraps. It is usually okay to do from a desk, table, or small craft space.

    It can become messier if you use liquid glue, paint, ink, or lots of tiny cuttings. To keep things simple, use a tray, scrap paper, or a small box to hold everything until you need it next.

    Storage is probably the biggest challenge you will encounter with collages. Paper scraps can build up quickly, so it helps to keep them in envelopes, folders, or small containers.

    What Is the Easiest Collage Project?

    One of the easiest collage projects is a simple greeting card. You can use coloured paper, magazine cuttings, stickers, or patterned paper to create a small design.

    Other easy beginner collage projects include:

    • A bookmark
    • A journal page
    • A mood board
    • A gift tag
    • A notebook cover
    • A simple flower picture
    • An abstract colour collage
    • A vision board

    It’s usually far better if you start off small, as attempting a very large collage can be too overwhelming if you are new to choosing and arranging materials.

    What Is a Mood Board?

    A mood board is a type of collage that brings together colours, images, textures, words, and ideas around a theme. It can be used for planning a room, a craft project, a personal goal, a brand style, or a creative idea.

    Mood boards are a good beginner collage project because they don’t need to be perfect. The aim is to collect a feeling, style, or direction rather than make a detailed finished artwork.

    Common Beginner Collage Mistakes

    Common beginner mistakes include:

    • Using too much glue
    • Sticking pieces down too early (instead of planning properly)
    • Adding too many unrelated materials
    • Choosing paper that is too thin to cope with wet glue
    • Making the design too crowded
    • Not leaving enough space
    • Using bulky items on thin paper
    • Worrying too much about perfection! Collages are supposed to be fun

    A useful beginner tip is to arrange everything before gluing it down. You can take a quick photo of the layout if you want to remember where each piece goes.

    Who Might Enjoy Collage?

    Collage may suit you if you like paper crafts, colour, texture, journaling, scrapbooking, or creative projects that don’t need perfect drawing skills or lots of artistic flair.

    It may also be a good hobby if you want something:

    • Affordable
    • Beginner-friendly
    • Easy to personalise
    • Suitable for small spaces
    • Good for putting paper scraps to good use, instead of throwing them away
    • Relaxing and creative
    • Possible to do in short sessions and come back

    However, collage may not suit you if you dislike cutting, sorting paper, or working with glue.

    Final Thoughts

    Collage is a simple and flexible craft where different materials are arranged and glued together to create a new design. It can be used for cards, journals, scrapbook pages, mood boards, wall art, and many other creative projects.

    If you are new to collage, start off with paper, scissors, glue, and a small surface such as a card or journal page. Choose a few colours or images, arrange them before sticking anything down, and keep your first project as simple as possible. Once you get used to the process, collage can become a very relaxing and creative hobby and you can use your skills and imagination to create something more ambitious!
  • What Is Junk Journaling?

    What Is Junk Journaling?

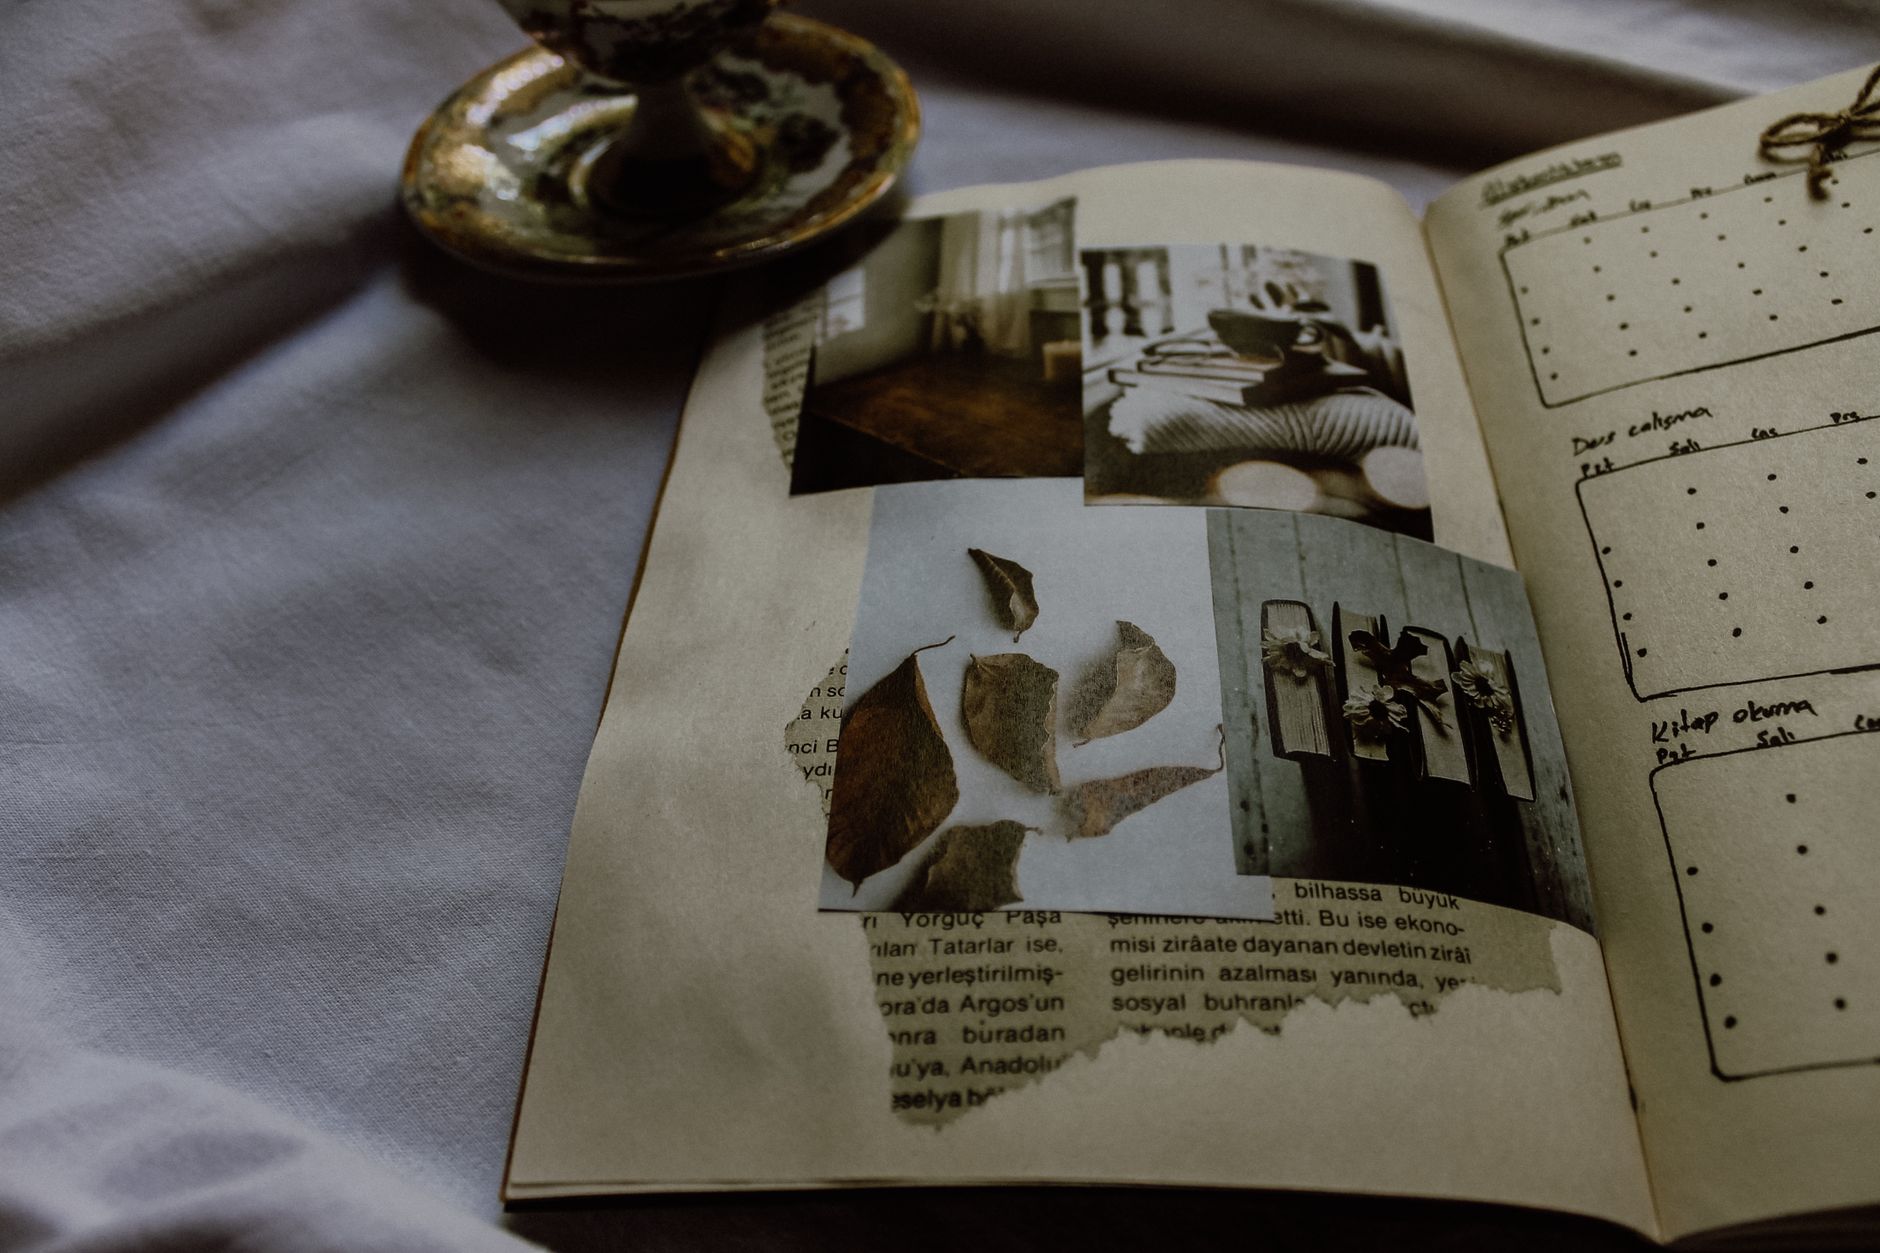
    Junk journaling is the hobby of creating or decorating books using a mixture of media, including scraps (hence the term ‘junk’). You can use anything you have available, whether it’s old train tickets or Christmas wrapping paper!

    What Do People Put In a Junk Journal?

    People put a variety of different materials into a junk journal. There really are no rules here, so you can use whatever you have available or whatever inspires you. This could include book pages, envelopes, tickets, receipts, postcards, stickers, labels, tags, scraps of fabric, notes, or photographs.

    The main idea of a junk journal is that it is highly personal. It doesn’t have to follow a particular structure or be planned out in a certain way. You could use some pages for writing and others in a more decorative fashion, whatever takes your fancy.

    Is Junk Journaling Good For Beginners?

    Junk journaling is extremely beginner friendly because there is no particular technique or way to do it. That means that there is not really a learning curve or the need to master a craft in the way that there might be for something like macramé or cross stitch.

    Junk journaling is a very forgiving hobby as well. If you don’t like how a page looks, you can cover it over or simply move on. It’s not something that has to be finished off in a certain way or to a certain level of neatness.

    What Do You Need to Start Junk Journaling?

    You only need a few supplies to get started. A notebook or some folded paper can be used as your book base. Then, you can add a number of different materials. You also likely need scissors, glue, and a pen.

    Useful beginner supplies include:

    • A notebook, old book, or folded paper
    • A glue stick or craft glue
    • Scissors
    • Pens or pencils
    • Envelopes
    • Old papers, packaging, or magazine cuttings
    • Washi tape, stickers, or stamps

    You can add more supplies later on, if needed. It’s best to start off with simple materials and only expand if you really get into the hobby.

    How Much Space Does Junk Journaling Need?

    Junk journaling really doesn’t need much space. It can be done at a desk or kitchen table. For this reason, it makes a great activity for people who don’t have a dedicated craft room.

    The biggest challenge you will likely encounter is in storing your paper supplies. Junk journaling can create clutter very quickly if you store everything randomly; a pouch, small box, or a folder can be a great way to save everything for use when you need it.

    Is Junk Journaling Expensive?

    Junk journaling can be a very affordable craft. You only really need to invest in basic supplies such as pens, pencils, scissors, and glue, and then possibly a blank book to work off.

    The rest of the supplies can be items that you already have lying around the house. You can build up supplies over time as you save items from your life that you have invested in anyway, such as train tickets or newspaper or magazine clippings.

    This hobby can, however, get more expensive should you choose to invest in specialist paper or supplies such as stamps or other embellishments. For beginners, this is not necessary.

    Who Might Enjoy Junk Journaling?

    Junk journaling might suit people who enjoy paper crafts, collecting small keepsakes, writing, and scrapbooking. It’s particularly good for those who like open-ended crafts where they can use creativity, rather than things that are very structured or precise.

    Is Junk Journaling the Same as Scrapbooking?

    Whilst junk journaling and scrapbooking are very similar, they don’t really have the same intention.

    Scrapbooking is more about preserving memories through the use of photos, notes, or other keepsakes from a particular day, holiday, or event. Scrapbooking, therefore, can be considered reasonably structured.

    Junk journaling is more ‘random’ and open ended, and more decorative. It doesn’t have to be based around particular memories, although it can if desired. Junk journaling can incorporate various types of scrap paper, such as newspaper cuttings, that take the hobbyist’s fancy. In this way, it can be more purely aesthetic than scrapbooking.

    Is Junk Journaling the Same as Art Journaling?

    Although art journaling is also very similar to junk journaling, it focuses more on drawing, colouring, and painting than the paper scraps that make up junk journaling.

    However, it is important to note that junk journaling can be mixed media in that it incorporates notes and perhaps drawings if the hobbyist wishes.

    What is a Good First Junk Journal Project?

    A good first project for a beginner could be to start with just one page in a spare notebook and decorate it with items already lying around.

    You don’t even need to invest in a new notebook if you are not sure if you will like junk journaling. If you have a notebook to hand and don’t mind sacrificing a page or a two page spread, you can start off by gluing down some paper scraps and adding a few notes or doodles.

    Final Thoughts

    Junk journaling is a flexible, paper-based craft that is very beginner friendly. It is very forgiving in that it doesn’t demand that you master complex techniques, and it’s great for creating personalised pages.

  • What is Polymer Clay? A Beginner’s Guide

    What is Polymer Clay? A Beginner’s Guide

    Polymer clay is a type of clay that can be baked in the oven, in contrast to air dry clay, which doesn’t need heat to harden, and pottery clay, which needs a kiln.

    This makes it a great material for beginners to make small, non-food objects at home with relatively little mess and relatively safely, if care is taken.

    What Is Polymer Clay?

    Polymer clay is clay that can be hardened in the oven. This is in contrast to pottery clay, which needs a kiln, and air dry clay, which hardens by itself as it dries.

    Polymer clay comes in a variety of different colours and can be used to make small charms or jewellery.

    What Can You Make With Polymer Clay?

    Polymer clay is best for small, intricate objects, rather than big pottery projects (for which pottery clay is the better choice). It is therefore great for making:

    • Earrings
    • Charms
    • Beads
    • Keyrings
    • Fridge magnets
    • Miniature food
    • Small animals
    • Christmas decorations
    • Dollhouse accessories

    Is Polymer Clay Good For Beginners?

    Yes, polymer clay is a great choice for beginners, as it can be baked in your home oven, rather than needing a kiln.

    Also, unlike air dry clay, you don’t need to worry that it’s going to dry out whilst you are trying to work with it. If you make a mistake, you can reshape it easily before you bake it.

    What Do You Need to Start With Polymer Clay?

    As a beginner, you don’t need a huge kit to get started. You just need a few items such as:

    • A few blocks of different clay
    • A clean, flat work surface
    • A rolling pin
    • A baking tray
    • Baking paper
    • An oven thermometer
    • A storage box for your leftover clay

    How Much Space Does Polymer Clay Need?

    Not very much. You don’t need a full hobby room, or a proper studio, kiln, and potter’s wheel like you might if you were trying to use pottery clay.

    You just need a flat surface that you can protect from mess, such as a kitchen table or desk covered with a tray, mat, or board. You will also need somewhere to store supplies, as well as access to an oven for baking.

    Is Polymer Clay Expensive?

    Polymer clay can be cheap if you start small. As with any new hobby, it can get expensive if you buy lots of colours and supplies. Start off small with a few basic tools and a couple of colours of clay.

    Then, if you get into using polymer clay often, you can expand to buy rollers, cutters, proper starter kits, or perhaps a pasta machine designed for flattening clay.

    Who Might Enjoy Polymer Clay?

    Polymer clay may be good for you if you enjoy:

    • Small, detailed projects
    • Making jewellery
    • Making gifts for others
    • Projects that don’t need lots of wet mess

    It may not be suitable if you:

    • Dislike making small, fiddly objects
    • Don’t want to wait for items to bake
    • Are not able to ventilate a room or keep children or animals away from fumes and odours from baking clay.

    Is Polymer Clay the Same as Air-Dry Clay?

    No, these are two separate types of clay. Whilst air dry clay dries without an external heat source (the water evaporates as it dries), polymer clay does need baking in an oven.

    However, these are both beginner friendly materials that can be used at home, without the need for a kiln.

    Is Polymer Clay Safe to Use?

    If you follow the instructions on the packaging and take some safety precautions, polymer clay can be safe to use.

    The most important thing is to ensure you don’t overbake it, as this can lead to the production of toxic fumes. Ensure that your kitchen is well ventilated and be aware that animals may be vulnerable to any fumes and odours, particularly birds.

    It is also important to mention that it’s not food safe, so shouldn’t be used to make crockery or any other items that you eat off. Stick to small decorative items such as charms and jewellery, and don’t let children use polymer clay unsupervised.

    Final Thoughts

    Polymer clay is a great alternative to pottery clay, as it doesn’t need a kiln. If you take some safety precautions, it can be a great material for making jewellery and small trinkets.

    If you don’t want to bake clay, air dry clay may be a more suitable option to try.

  • What is Air Dry Clay? A Guide For Beginner Hobbyists

    What is Air Dry Clay? A Guide For Beginner Hobbyists

    Air dry clay is a soft modelling material that hardens when it’s exposed to air. That means that you don’t need to put it in an oven (like you would with polymer clay) or a kiln (like for pottery clay).

    Because you don’t need heat to use air dry clay, it’s a great material for beginner crafters or children to use.

    In this guide, we look at what air dry clay is, what you can make with it, and what types of people may enjoy using it.

    What is Air Dry Clay?

    Air dry clay is a variety of clay that dries at room temperature by itself. It doesn’t need an oven or kiln to harden it, as polymer and pottery clay respectively do.

    How Does Air Dry Clay Work?

    Air dry clay hardens as the moisture evaporates, leaving the clay. The drying time of a clay piece can depend on:

    • How thick the piece is.
    • The brand of clay.
    • The room temperature.
    • Airflow.
    • Humidity.

    This means that small or thin pieces can dry out within a day, whereas thicker or big projects make take several days. It’s important that you don’t attempt to paint or seal your clay piece until it’s fully dry.

    What Can You Make With Air Dry Clay?

    Some project ideas for air dry clay are:

    • Ornaments
    • Small sculptures
    • Beads
    • Wall hangings
    • Candle plates
    • Fridge magnets
    • Simple jewellery pieces

    Is Air Dry Clay Good For Beginners?

    Yes, air dry clay is a great option for those new to using clay, as it doesn’t need special equipment or a heat source to harden it.

    You can buy this type of clay quite cheaply, and can shape projects by hand. It’s also quite easy to fix any mistakes by using water to smooth them over.

    What Do You Need to Start?

    Beginners may need:

    • Air dry clay
    • A rolling pin or bottle
    • A craft knife or other clay tools
    • A small bowl of water
    • Sandpaper for smoothing edges
    • Acrylic paint
    • Paintbrushes
    • Sealant or varnish
    • A tray or board to work on.

    Does Air Dry Clay Need Baking?

    No, it doesn’t need baking, which is the main difference between air dry and polymer clay. Air dry hardens as the water in it evaporates into the air.

    Is Air Dry Clay Waterproof?

    No, this type of clay is not waterproof. Once it is dry, it can be painted and sealed, but it’s best used for decorative items only. Air dry clay is not suitable for making pottery for functional use, such as for mugs or bowls.

    Air Dry Clay vs Polymer Clay

    Air dry clay dries naturally without needing an oven is a suitable for home crafts and decorations.

    Polymer clay is the type of clay that needs to bake to harden, and can be used to make jewellery, charms, and miniatures.

    Common Beginner Mistakes

    Usual pitfalls include:

    • Making pieces that are too thick
    • Painting before the clay is dry
    • Not sealing your finished projects
    • Using too much water
    • Leaving your unused clay uncovered (it will harden!)
    • Making delicate things too thin
    • Expecting it to behave just like pottery clay would

    How to Store Polymer Clay

    As air dry clay dries out when it’s exposed to the air (hence the name), it needs to be stored carefully, properly sealed.

    Your options include:

    • Storing it in the original packaging.
    • Wrapping it in plastic very tightly.
    • Placing it in an airtight container.

    Also make sure to store your clay away from heat sources and to only take what you need each time. Don’t expose clay to the air unnecessarily.

    Some Final Thoughts

    Air dry clay is a type of modelling clay that dries out when exposed to the air. It doesn’t need to be baked in an oven or heated in a kiln, so it’s an easy hobby for beginners to try at home.

    Keep first projects simple and make sure to let your item dry before you attempt to paint and seal it.

  • What Is a Bone Folder (and Do You Need One)?

    What Is a Bone Folder (and Do You Need One)?

    Affiliate Disclosure: This post contains affiliate links. As an Amazon Associate, we earn from qualifying purchases, at no extra cost to you.

    A bone folder is a simple hand tool that is used in paper crafts, card making, book binding, and scrapbooking.

    What is a Bone Folder?

    A bone folder is a smooth, flat tool that is used in paper crafts to crease, fold, smooth, and score paper or card.

    What is a Bone Folder Used For?

    A bone folder can be used for any of the following:

    • Folding card blanks
    • Making sharp creases
    • Scoring paper
    • Card making
    • Envelopes
    • Bookbinding
    • Scrapbooking

    What Is It Useful in Cardmaking?

    A bone folder is a great way to make folds look neater and more professional than folding by hand. It stops folded paper or card looking roughly folded.

    Do Beginners Need a Bone Folder?

    A bone folder is not essential but beginner card makers, but they are very useful for others who make cards regularly. These tools are an affordable alternative to folding your card creations by hand.

    Bone Folder vs Scoring Tool

    Whilst bone folders and scoring tools are both used to make neater folds, they are slightly different. A scoring tool is used to make a crease line, so that the paper can then fold more easily.

    On the other hand, a bone folder is used after the scoring tool to press down the fold and to make it more crisp. You likely don’t need both as a beginner; a bone folder is capable of both light scoring and then pressing down the fold. You may, however, need a separate scoring tool if you are working with very thick card stock.

    Beginner Mistakes

    Mistakes beginners sometimes make include:

    • Pressing too hard and marking the paper
    • Folding without measuring the paper
    • Using it too roughly on delicate paper

    Final Thoughts

    A bone folder is a small but very useful tool that is used to help fold paper. Whilst it is not an essential purchase, it can be a great way to ensure that you get a clean fold for papercrafts such as card making.

  • What is Soap Making? A Guide For Beginners

    What is Soap Making? A Guide For Beginners

    Affiliate Disclosure: This post contains affiliate links. As an Amazon Associate, we earn from qualifying purchases, at no extra cost to you.

    Soap making is the hobby of turning fats and oils, along with other ingredients, into bars of soap or liquid soap.

    This guide explains the basics of what soap making is, what you need to get started, and which method is best for complete beginners.

    What Is Soap Making?

    Soap making is the process of making soap by combining fats or oils with an alkaline ingredient. Lye is the most common alkali used.

    The chemical reaction that the ingredients undergo that turns them into soap is called saponification.

    How Does Soap Making Work?

    There are three main components to soap: fats or oils, lye, and another liquid, such as water. Once the oil/ fat are combined with lye, the mixture becomes thick and can be poured into a mould, where it sets to become soap.

    Cold process soap is often left to cure over time. During curing, extra water in the soap evaporates, which leads to hardening. Melt and pour soap doesn’t need to be cured, it just needs to solidify in the mould. It can then be used.

    The Main Types of Soap Making

    There are four main types of soap making; melt and pour, cold process, hot process, and rebatching.

    Melt and pour is by far the easiest method for beginners to follow. It involves melting down a ready-made soap base, adding colour and scent as desired, pouring it into a mould and letting it harden. As the soap you melt down is pre-made and has already gone through a chemical reaction, you do not need to use lye yourself.

    Cold process is the ‘traditional’ method for making soap. Oil or fat is mixed with a lye solution, making soap through a chemical reaction called saponification. This mixture can then be poured into a mould and set, just as with melt and pour. However, not only does it harden, it can be left for several weeks to cure.

    This method is more hazardous and difficult for beginners, as it involves exposure to lye (sodium hydroxide for solid soap, potassium hydroxide for liquid).

    The Hot process method is similar to cold process, but involves heating the ingredients as one of the steps. As the mixture is heated, it leads to a quicker curing process.

    Rebatching or hand milling is when previously made soap is shredded and melted down, before being reset. It doesn’t need extra lye is and a great way to recycle old bits of soap, or to re-use soaps that haven’t been quite gone to plan!

    What Do You Need to Make Soap?

    The following ingredients are needed for a basic melt and pour soap:

    • Soap base
    • A heat-safe bowl or jug
    • Soap moulds
    • Fragrance or essential oil
    • Soap colorant
    • A spoon or spatula
    • A spray rubble with rubbing alcohol (optional)

    You can also buy pre-packaged kits for melt and pour soap.

    If you wish to do a cold process soap, you also need lye, scales, gloves and goggles.

    Is Soap Making Safe?

    Soap making is safe if you are careful and follow methods carefully.

    Melt and pour is the safest method for beginners, as the soap base is pre-made. Hot and cold process soaps need the addition of lye, which is corrosive so can damage skin and surfaces if it gets onto them. For this reason, it is extremely important to handle lye carefully and wear protective gear.

    What is the Easiest Method For Beginners?

    Melt and pour is definitely the easiest method for beginners to follow. This is because the soap base that you are using is pre-made; the chemical reaction of saponification has already taken place. If you use the melt and pour method, you won’t need to handle lye.

    What Can You Add to Hand Made Soap?

    There are several things that made great additions to soap. You can add scents, colours, botanicals and gentle exfoliants such as:

    • Fragrance or essential oils
    • Soap colorants or mica powder
    • Dried flowers or petals
    • Oats (these are great for gentle exfoliation)
    • Poppy seeds
    • Coffee grounds
    • Honey
    • Shea or cocoa butter
    • Clay
    • Soap glitter

    How Long Does Soap Take to Make?

    Depending on the method you use, making soap can take a few minutes to several weeks.

    Melt and pour is the quickest method, and can take usually 30 to 60 minutes of time to prepare, and then usually sets within a couple of days.

    Cold process soap needs a couple of hours to prepare, and then perhaps 4 to 6 weeks to set and cure properly.

    Hot process soap takes extra time to actively make, due to needing to be heated. It then needs extra time for drying and curing, although perhaps less than cold process.

    If you want a quick method that can give you a gentle start to soap making and give you a ready-to-use result in days, not weeks, melt and pour is probably the best way to go.

    Is Soap Making Expensive?

    Soap making can be inexpensive at a beginner level, especially for melt and pour. However, if you buy lots of moulds, oils, colorants, and other additions, the costs can quickly stack up.

    It’s best to start small, see if you enjoy it, and then introduce more variety from there.

    Is Soap Making a Good Hobby?

    Soap making can be a great hobby if you enjoy practical hobbies that give you something you can use. As there are a few different methods of soap making, you can make the process as simple or complex as you like.

    It is a great craft for people who like:

    • Making handmade gifts
    • Choosing scents, colours, and additions
    • Making things you can actually use
    • Experimenting with customisation and making personalised items for friends and family
    • Controlling what goes into the products you use

    What About Liquid Soap?

    Liquid soap is possible to make at home, but it is a more complex process than creating regular, solid soap bars.

    Whilst solid soaps are made with sodium hydroxide lye, liquid soap requires potassium hydroxide instead. This means that you need to measure ingredients very precisely and heat the mixture for several hours.

    As there is a lot that can go wrong, liquid soap is probably not the ideal place to start for a complete beginner.

    Common Beginner Mistakes

    Some common pitfalls for beginners to avoid include:

    • Using unsafe ingredients that can irritate skin
    • Choosing a difficult method when you are not experienced
    • Neglecting curing time for cold process soap
    • Being careless with lye, which can be very corrosive
    • Not measuring ingredients properly
    • Buying lots of equipment and additions when you don’t know if you enjoy the hobby

    Final Thoughts

    Soap making is a great hobby if you are creative and enjoy making gifts for others and yourself! Beginners can start off with melt and pour, before perhaps progressing to cold or hot pour methods, which require the use of lye.

    The important thing is to start off simply instead of buying too many supplies off the bat!

  • What Are Card Toppers?

    What Are Card Toppers?

    Affiliate Disclosure: This post contains affiliate links. As an Amazon Associate, we earn from qualifying purchases, at no extra cost to you.

    Card toppers are decorative pieces that are added to the front of homemade cards. They can be printed designs, layered shapes, pictures, or greetings.

    What Are Card Toppers Used For?

    Card toppers are used as a way to decorate a card quickly. They are perfect if you don’t want to design an image or centrepiece from scratch.

    Are Card Toppers Good For Beginners?

    Yes, due to their simplicity, card toppers are ideal for newcomers to card making. You can make a simple yet elegant card very quickly by starting with a piece of folded card or paper, adding a card topper, and then adding other elements such as written words and washi tape.

    Are Card Toppers the Same as Embellishments?

    No, these are not exactly the same thing. Whist card toppers are technically a type of embellishment, as they are an added extra on a card, true embellishments are anything else that you can add, such as glitter or sequins. Card toppers are the decorative centrepiece on the front of a card, rather than a smaller extra.

    What Do You Need to Use Card Toppers?

    You may need a few supplies alongside your topper:

    • Blank cards
    • Cardstock
    • Glue or double sided tape
    • Foam pads
    • Stickers
    • Washi tape
    • Stickers

    Where Can I Buy Card Toppers?

    You can buy card toppers in a variety of styles from a good hobby shop, or on Amazon. Toppers are often available in themed collections, such as these Mother’s Day adhesive circles.

    Final Thoughts

    Card toppers are a great way to finish off homemade cards, without requiring advanced drawing or design skills. They are great for beginners and can be combined with extra embellishments to make a perfect greetings card from home.

  • What is Washi Tape?

    What is Washi Tape?

    Affiliate Disclosure: This post contains affiliate links. As an Amazon Associate, we earn from qualifying purchases, at no extra cost to you.

    Washi tape is a popular craft supply, but beginner hobbyists may not have heard of it. In this guide, we look at what washi tape is and how it’s different from regular types of tape, such as duct tape and Sellotape.

    What is Washi Tape?

    Washi tape is a type of decorative tape that is made out of Japanese paper. It is low tack and can be removed and repositioned easily, something which is not usually possible with tape. Washi tape usually has designs, patterns, or colours printed on it, and can be worn very easily by hand.

    What is Washi Tape Used For?

    Popular uses include:

    Is Washi Tape the Same as Normal Tape?

    No; whilst regular tape is very practical and is used merely for sticking things down, washi tape also serves a decorative purpose. It can be used to add colours of patterns to your project, so is great for crafts like card making.

    Why Do Crafters Like Washi Tape?

    Washi tape is easy to use, as it can be ripped by hand. It is available in a variety of different colours and patterns, so you can customise your designs as you wish. It’s also very easy to store and great for low-mess crafts.

    Is Washi Tape Good For Beginners?

    Yes, washi tape is perfect for beginners. It’s easy to use and doesn’t need any other special equipment to cut or apply. If you want to lift the appearance of a piece of paper or card, washi tape may be your secret weapon!

    Just one thing to keep in mind; although it may be tempting to buy rolls in many different patterns and colours, it’s best to start with just one or two packs and then expand your collection over time.

    What Crafts Use Washi Tape?

    Washi tape is useful for:

    • Card making
    • Scrapbooking
    • Junk journaling
    • Decorating planners
    • Collage
    • Paper crafts
    • Gift wrapping

    Do You Need Washi Tape For Card Making?

    Washi tape is not essential for card making, but it can make a nice extra touch. You can use it to add colour to your cards, create borders, or decorate your envelopes.

    What Washi Tape Should Beginners Start With?

    Beginner crafters should start small, investing in a couple of different rolls only. You may consider starting with one colour roll and one patterned roll of your choice. Avoid buying too many rolls or packs of rolls to start off; instead, choose designs or colours that can be used across many different projects. Pink or blue colours and floral designs work well.

    Common Beginner Mistakes

    Pitfalls to avoid include:

    • Buying too many rolls at once.
    • Choosing patterns or colours that don’t match your other materials.
    • Using it in place of stronger tape or glue (it won’t hold as well).
    • Using too many different patterns and colours on the same page.

    Related Supplies

    Supplies that can be used alongside washi tape include:

    • Cardstock
    • Blank cards
    • Scrapbook paper
    • Stickers
    • Craft glue
    • Scissors
    • A hole punch
    • Journal or notebook

    FAQs

    Can washi tape be removed?

    Yes, washi tape can usually be removed and replaced more easily than regular tape, although on some materials it might be harder to take off.

    Is washi tape sticky?

    Yes, but less so than normal or heavy duty tape. It is suitable for paper but don’t expect it to provide a very strong hold.

    Can you use washi tape on cards?

    Yes, washi tape is ideal for card making and other paper crafts, as it can add patterns and colours.

    Is washi tape worth buying?

    For beginner hobbyists who like paper crafts, a few rolls or a pack of washi tape could be a great investment. Just don’t go overboard and buy too many rolls from the start, tempting as it may be!

    Final Thoughts

    Washi tape is a type of decorative, paper tape that makes a great addition to paper projects. It is simple to use, but may not hold things together as strongly as traditional types of tape would.

  • What is Card Making? A Guide for Beginners

    What is Card Making? A Guide for Beginners

    Card making is the hobby of making handmade greetings cards. Instead of buying a ready-made card from a shop, you make your own. You can use paper, stamps, card, stickers, painting, or other decorations.

    What is Card Making?

    Card making involves making cards from scratch. This can be for a variety of occasions, such as birthdays, Christmas, weddings, thank-you notes, anniversaries, and other occasions.

    The very easiest form of making cards involves folding a piece of paper in two, adding a design to the front, and writing a message inside.

    What Can You Make With Card Making?

    You can make cards for many different types of greetings and occasions:

    • Birthday
    • Christmas
    • Thank-you
    • Wedding
    • Anniversary
    • Sympathy
    • New baby
    • Exam pass
    • Graduation
    • Driving test pass
    • Birthday invitations
    • Small gift tags

    You can also make cards in many different styles; you can go for simpler designs, or more elaborate creations, with many layers or patterned paper. You can also include glitter, ribbon, stamps, or small decorations.

    Is Card Making Good For Beginners?

    Card making makes a great hobby for beginners. You do not need to be a highly skilled artist, nor do you need to make complicated designs as a beginner.

    A beginner card may just be as simple as a folded piece of card or paper, with a pattern or image on the front, and a message on the inside.

    If you start making a card and it goes wrong or you don’t like the design, it’s pretty easy to just cut your losses and start again. Materials for each card, especially for a newbie, are often very inexpensive.

    What Do You Need to Start Card Making?

    You only need a few items to get started. These include:

    • Blank cards or envelopes
    • Colour or patterned paper
    • Glue or double sided tape
    • Pens or markers
    • Stickers, stamps, glitter, and other decorations

    If you enjoy your first attempts at this hobby, you can progress to more ambitious designs and equipment. Some people use paper trimmers or die-cutting machines, but these are not needed for a beginner. It’s better to make a simple start and then incorporate other techniques and materials as you become more comfortable.

    How Much Space Does Card Making Need?

    Card making doesn’t need a lot of space. You can make cards at the kitchen table, in a hobby corner, desk, or tray. It is a good hobby if you don’t have a dedicated area, as it’s not overly messy, barring the use of a small amount of glue, paint, or glitter.

    Simple supplies are also very easy to store, and could go in a box, draw, or small organiser or trunk.

    Is Card Making Expensive?

    Card making is a very accessible, cheap hobby to start. If you are making simple cards, you only need materials such as paper, glue, card, pens, and a few decorations.

    It can get more expensive if you invest in specialist supplies and tools, such as a paper cutter, stamps, ink pads, and dies. For beginners, it’s best to start with simple supplies and see whether you want to take the hobby further.

    Who Might Enjoy Card Making?

    Card making can suit people who enjoy creative hobbies but want to make something practical.

    It can be a good choice for:

    • People who enjoy stationery and paper crafts.
    • Beginners who want a simple craft option.
    • Families with children.
    • Adults who want a relaxing hobby.
    • People with limited space.
    • Anyone who enjoys seasonal crafts, such as Christmas, Easter, or Halloween.

    The great thing about card making is that you can make things for other people. A hand-made card can feel more personal and heart-felt than a regular, store bought one.

    Is Card Making the Same as Scrapbooking?

    Card making and scrapbooking are similar, but they are not identical. Both hobbies use paper, card, stamps, stickers, photos, and other decorations.

    However, whilst card making involves making greetings cards, scrapbooking is for preserving memories such as holidays, gap years, and day trips. It can involve sticking down photos, attraction tickets, travel tickets, or entry wrist bands into an album or other layout.

    Scrapbooks are mainly for preserving and re-living memories of an event, day, or place, whilst card making is for creating greetings and other cards to wish others well for special occasions, or day-to-day regards.

    Is Card Making Just For Special Occasions?

    No, it isn’t. Whilst many people do make cards for occasions such as birthdays, Christmas, or anniversaries, you can also make thank you or thinking-of-you cards, or even blank cards to give to friends. The possibilities really are endless.

    You can also make cards in advance of an occasion and then use them when you need them. This can be a useful idea if you are prone to forgetting birthdays until the last minute!

    Final Thoughts

    Card making is a simple, creative hobby that involves making your own greetings cards from paper, card, and decorations. It is very beginner-friendly, doesn’t need much space, and be as simple or detailed as you wish.

    If you are making cards for the first time, it’s a good idea to keep it simplistic. You only need a few tools, such as paper, card, glue, and pens. You can then make more detailed designs as gain experience and learn which types of designs you enjoy making.

    Read Next

  • What is Cross Stitch? A Simple Beginner Guide

    What is Cross Stitch? A Simple Beginner Guide

    Affiliate Disclosure: This post contains affiliate links. As an Amazon Associate, we earn from qualifying purchases, at no extra cost to you.

    Cross stitch is a craft that involves making a picture or other pattern of out of ‘X’ shaped stitches. It’s a type of embroidery.

    What is Cross Stitch?

    Cross stitch is a type of craft that involves X shaped stitches, often on fabric with a grid. It can be used to make cards, pictures, or other decorations.

    How Does Cross Stitch Work?

    Cross stitch is done on fabric that has a grid to follow. A special cloth known as Aida cloth is often used. The fabric used has small holes in it which are arranged in squares, and you use those holes to make a stitch.

    You stitch one diagonal line in across each square, then you stitch another line in the opposite direction, on the same square. Together, these two stitches form an ‘X’ shape, hence the name ‘cross stitch’.

    What Equipment Do You Need?

    You may need the following items:

    • Cross stitch fabric
    • Embroidery thread
    • Needle
    • Hoop
    • Scissors
    • Pattern

    Alternatively, complete beginners may consider buying a cross-stitch kit, such as this bookmark kit.

    Is Cross Stitch Good For Beginners?

    Yes, it’s a good option for beginners due to its simplicity. You don’t need to be a highly skilled painter or drawer or very artistic to cross stitch, you just have to be able to follow a chart and cope with repetition!

    You can also pick up and put down your work very easily, as you would for other embroidery or knitting. Cross stitching doesn’t require messy glue, paint, or sequins, like other crafts, so doesn’t need a dedicated, protected table or craft corner.

    Cross Stitch vs Embroidery

    Cross stitch is a type of embroidery, but not all embroidery is classed as cross stitch. Embroidery encompasses a wide variety of stitches and techniques, and can be freeform in many cases, rather than following the grid pattern of cross stitch.

    Is Cross Stitch the Same as Needlepoint?

    No, although these are similar crafts, needlepoint and cross stitch are not the same.

    Cross stitch consists of small X-shaped stitches that are used to make a picture or pattern. It usually is done on fabric that has a grid, such as Aida cloth. This makes it easy to count where each stitch needs to go.

    Needle point, on the other hand, is done on a stiffer, open-weave canvas. It uses a diagonal stitch that is known as a ‘tent stitch’ to cover the canvas. Decorative stitches and different textures are also used.

    What Can You Make with Cross Stitch?

    There are several options for cross stitch projects, including:

    • Framed designs
    • Bookmarks
    • Cards
    • Decorations

    Wrapping It Up

    Cross stitch could be a good hobby to consider if you want a simple, beginner friendly hobby that can be picked up and put down as needed, and doesn’t need a lot of equipment or messy supplies.