Category: Uncategorized

  • Do You Need a Pattern For Macramé?

    Do You Need a Pattern For Macramé?

    You don’t need a pattern for every macramé project.

    Simple projects can often be made by learning a few basic knots and arranging them in your own way. However, following a structured pattern can make macramé easier when you are a beginner or when you want to make a project of a specific shape or size.

    What is a Macramé Pattern?

    A macramé pattern is a set of instructions that shows you how to make a specific project.

    What Does a Macramé Pattern Tell You?

    Patterns may tell you:

    • What type of cord to use
    • How much cord to cut
    • How many cords you need
    • Which knots to make
    • The order of the knots
    • Where to leave spaces
    • How to finish the project

    Some patterns use written instructions, whilst others present information in videos, photos, or diagrams.

    Are Patterns Useful For Beginners?

    Patterns can be very helpful for beginners to macramé because they take away a lot of the guesswork involved.

    It can be difficult to know how much cord to cut or where each knot should go when you are just getting started with your very first project. A pattern, on the other hand, gives you a clear sequence to follow.

    It can also show you how different knots can be combined to create a finished design.

    However, you don’t need to understand complicated pattern symbols before you start macramé. Many beginner patterns use simple photographs and step-by-step instructions.

    Can You Make Macramé Without a Pattern?

    Yes, you can definitely make macramé pieces without following a formal pattern.

    You could attach several cords to a dowel or ring and experiment with square knots, spiral knots, and rows of half hitch knots.

    Simple projects such as keyrings, small wall hangings, and basic plant hangers can often be adapted as you work.

    Making macramé projects without a pattern gives you more freedom, but you will need to make your own decisions about:

    • The length of the project
    • The spacing between knots
    • The number of cords
    • The overall shape
    • How much cord you need

    It’s usually easier to improvise once you understand a few basic knots first.

    When Do You Need a Pattern?

    A pattern is particularly helpful when making:

    • A detailed wall hanging
    • A plant hanger that needs to fit a particular pot
    • Repeated geometric designs
    • Macramé bags
    • Clothing or accessories
    • Projects with several sections
    • Items that need accurate measurements

    Without instructions, it can be difficult to reproduce a complicated design or make sure that all parts are even.

    Can You Change a Macramé Pattern?

    Yes, you can alter and adapt macramé patterns to suit your needs. You don’t have to follow a pattern exactly.

    You can change things like the cord colour, or you can add beads, shorten the fringe, or repeat a section more times than the instructions state.

    You might also be able to make the pattern wider by adding more cord, although this will mean that you’ll need more cord for your project.

    As a beginner, you will probably find it easier to follow a project’s instructions fully the first time you make it. You can then make alterations for subsequent projects.

    Can You Create Your Own Macramé Pattern?

    You can plan your own project by planning the shape of the project and deciding which knots you want to use.

    It can help to sketch out the design first and write down:

    • The number of cords
    • The length of each cord
    • The order of the knots
    • The number of rows
    • The distance between sections

    You can also make a small sample before cutting cord for a larger project.

    Keeping notes will make it easier to repeat the design later.

    Do You Need to Buy Macramé Patterns?

    You don’t need to spend money on a pattern to start macramé.

    There are many free beginner patterns, tutorials, and videos available. Paid patterns may be useful if they have a distinctive design that you are attracted to. Detailed measurements and very clear instructions are other great reasons to purchase a pattern.

    Before you buy a pattern, check that it’s suitable for beginners and that it explains how to do the knots that it uses.

    So, Do You Need a Pattern For Macramé?

    In short, no, a macramé pattern is not absolutely essential for beginners. If you are okay with experimenting with designs, patterns are even less of a requirement.

    However, fixed patterns can be useful for some people. If you want clear instructions, accurate measurements, or a particular finished design, macramé patterns can be great.

    Beginners may find it easiest to get started with a simple pattern and then begin changing or creating designs once the basic knots feel familiar.
  • What Is Flower Pressing?

    What Is Flower Pressing?

    Affiliate Disclosure: This page contains affiliate links. As an Amazon Associate, we earn from qualifying purchases, at no extra cost to you.

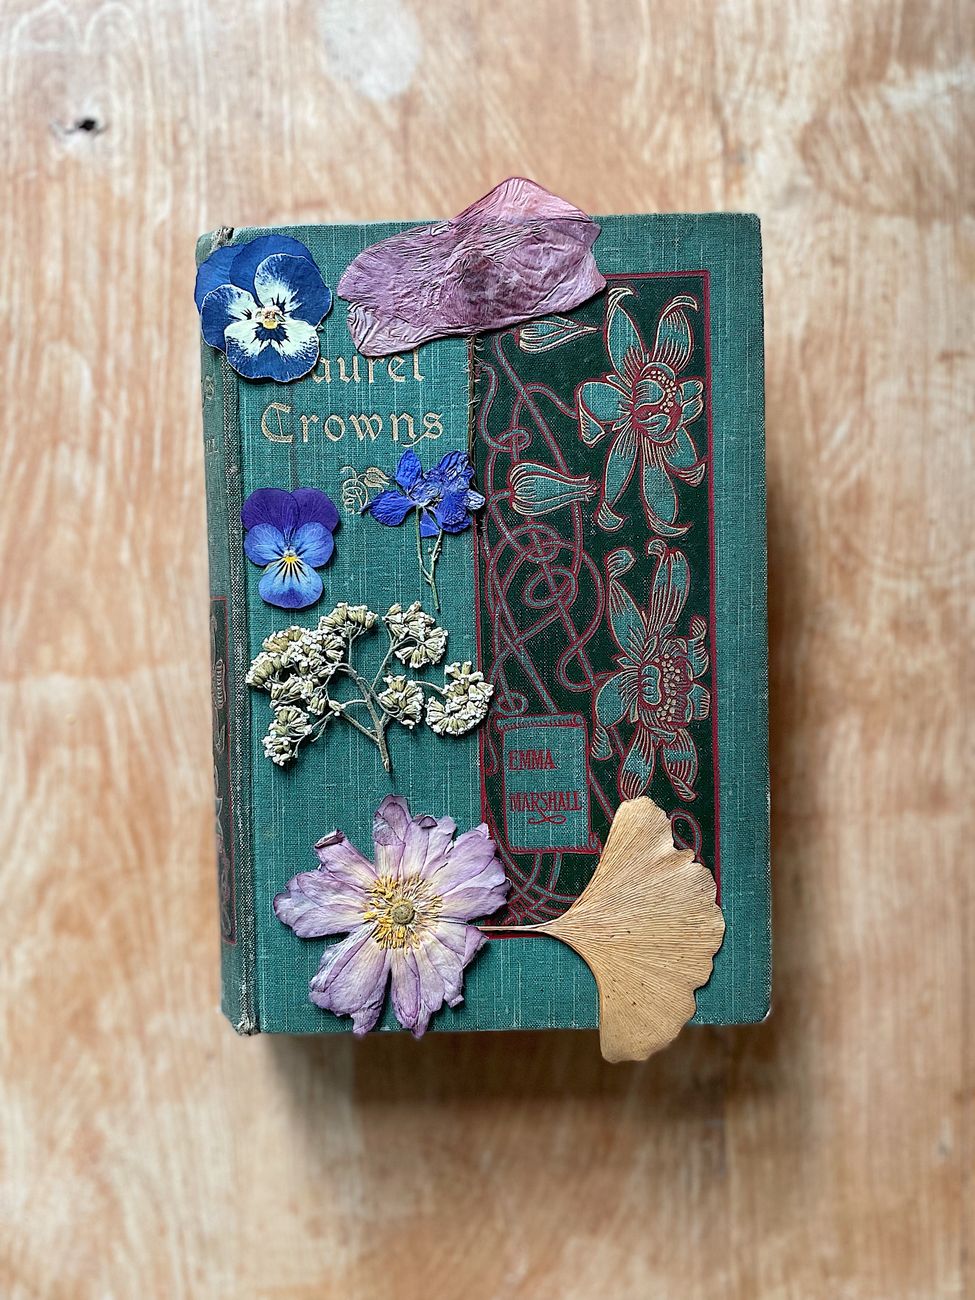
    Flower pressing is the craft of flattening and drying flowers so that they can be used for decoration, art, and keepsakes. Pressed flowers can be used in cards, bookmarks, framed art, scrapbooks, journals, resin crafts, gift tags, and handmade stationery.

    The basic idea is very simple: flowers are placed in a flower press, between absorbent layers, pressed flat, and left to dry. Once the moisture has gone, the flowers keep their shape and colour but are now dry, flat, and more delicate than before.

    What Does Flower Pressing Mean?

    Flower pressing means preserving flowers by removing moisture, whilst keeping them flat. Instead of drying flowers upright in a bunch, flower pressing flattens each flower or petal between paper, books or in a dedicated flower press.

    Pressed flowers are usually fragile, but they can last a long time if they are handled carefully and kept away from damp conditions, bright sunlight, and rough handling.

    Flower pressing is often used for nature crafts, memory keeping, and decorative paper crafts.

    How Does Flower Pressing Work?

    Flower pressing works by using pressure and absorbent paper to dry flowers flat. The paper absorbs moisture from the flowers, while the weight or press stops them from curling up as they dry.

    A simple DIY method is to place flowers between sheets of paper inside a heavy book. The book can then be closed and weighted down for a few weeks whilst the flowers are allowed to dry.

    A proper flower press works in a similar way, but usually uses boards, paper and screws or straps to apply pressure evenly.

    What Do You Need for Flower Pressing?

    You don’t need many supplies to start flower pressing. A beginner setup might include:

    • Fresh flowers or leaves
    • Absorbent paper
    • A heavy book or flower press
    • Cardboard sheets
    • Scissors
    • Tweezers
    • Tissue paper or baking paper
    • A dry place to leave the flowers
    • A notebook or label if you want to record the names of your flowers

    You can buy a dedicated flower press or you can also start with books you already have at home. Just make sure the flowers are protected between paper so they don’t stain the pages of the book.

    What Flowers Are Best for Pressing?

    The best flowers for pressing are usually fairly flat, thin and not too watery. Small flowers and delicate petals tend to press more easily than thick, fleshy flowers.

    Good flowers for beginners include:

    • Pansies
    • Violas
    • Daisies
    • Cosmos
    • Forget-me-nots
    • Ferns
    • Leaves
    • Small wildflowers
    • Thin petals
    • Pressed herbs

    Very thick flowers, such as roses, carnations and large dahlias, can be harder to press whole. You can still press parts of them, such as individual petals, leaves, or smaller sections.

    How Long Does Flower Pressing Take?

    Flower pressing usually takes around two to four weeks, depending on the flower, the paper and the method you choose. Thin flowers may dry faster, whilst thicker flowers can take longer.

    It’s important not to remove the flowers too early. If they still contain moisture, they may curl, fade, tear or go mouldy.

    The flowers are ready when they feel dry, flat and papery rather than soft or damp.

    Can You Press Flowers in a Book?

    Yes, pressing flowers in a book is one of the easiest beginner methods. Place the flowers between sheets of absorbent paper, then put them inside a heavy book. Add more books or a weight on top to increase the pressure.

    This method is simple and cheap (no need to buy a separate press), but it does take some patience. It’s also best to use a book that you don’t mind risking, as flowers can sometimes leave marks if they are not properly protected.

    For better results, you can replace the paper after a few days if the flowers are very moist.

    What Can You Make With Pressed Flowers?

    Pressed flowers can be used in many decorative craft projects. Popular ideas include:

    • Handmade cards
    • Bookmarks
    • Framed flower art
    • Scrapbook pages
    • Junk journals
    • Gift tags
    • Resin pendants
    • Phone case decoration
    • Candles
    • Wedding keepsakes
    • Botanical prints
    • Decorative labels

    Pressed flowers work especially well with paper crafts because they are flat and lightweight.

    Is Flower Pressing Easy for Beginners?

    Flower pressing is very beginner-friendly. The basic technique is easy, and you don’t have to buy expensive equipment to try it out. You can either use a book you already have, or invest quite inexpensively in a flower press.

    The main challenge is choosing the right flowers and letting them dry fully. Flowers that are too thick, too wet or pressed when they are already damaged may not preserve well.

    For a first project, try pressing small flowers, petals, and leaves rather than attempting to tackle big or thick flowers.

    How Do You Keep Pressed Flowers From Fading?

    Pressed flowers naturally fade over time, but you can help them last longer by storing and displaying them carefully.

    To reduce fading:

    • Keep them out of direct sunlight
    • Store them somewhere dry
    • Handle them with tweezers
    • Use acid-free paper for keepsakes
    • Frame them behind glass
    • Avoid humid rooms
    • Seal finished projects if suitable

    Some flowers keep their colour better than others. Bright colours can soften as the flower dries, so the finished result may look more muted than when it was a fresh flower.

    Is Flower Pressing the Same as Drying Flowers?

    Flower pressing is a type of flower drying, but it is not the same as air drying flowers in a bunch.

    Pressed flowers are flattened between layers while they dry. Air-dried flowers usually keep more of their three-dimensional shape because they are dried upright or hanging.

    Pressed flowers are best for flat crafts like cards and framed art. Air-dried flowers are better for bouquets, wreaths and arrangements.

    Why Do People Like Flower Pressing?

    People like flower pressing because it is simple, gentle and personal. It can preserve flowers you have obtained from a garden, walk, wedding, special event, or a meaningful bouquet.

    It is also a low-cost craft that connects well with nature. You can collect seasonal flowers and leaves, press them slowly, and use them later in creative projects.

    Flower pressing is a good craft if you enjoy journaling, scrapbooking, card making, botanical art or slow seasonal crafts.

    Final Thoughts

    Flower pressing is the craft of drying flowers flat so they can be used in art, paper crafts and keepsakes. It is simple to start, inexpensive and suitable for beginners.

    You can press flowers with a heavy book or a special flower press. Small, thin flowers usually work best, and the key is to let them dry fully before you use them.

    Once pressed, flowers can be used for cards, bookmarks, framed art, journals, resin crafts and many other types of decorative projects.

  • Macramé Knots: A Basic Beginner’s Guide

    Macramé Knots: A Basic Beginner’s Guide

    Macramé is the hobby of tying knots out of cord to make decorative patterns. Thankfully, you don’t need to know lots of types of knot to get started, as most beginner macramé projects use a small number of basic knots.

    There are many things you can make once you know a few common knots, including wall hangings, keyrings, coasters, bookmarks, and other decorative projects.

    What Are Macramé Knots?

    Macramé knots are the tied sections that create a shape and pattern of a project. Some of these knots are used in order to attach the piece to a ring or dowel. Others are used to create decorative sections such as rows, diamonds, twists, or lines.

    Even the same knots can look different depending on factors such as the type of cord you use, how tightly you pull that cord, and how far the knots are spaced from each other.

    For complete beginners, the most useful knots are; the lark’s head knot, the square knot, half square knot, spiral knot, half hitch knot, double half hitch knot, and gathering knot.

    Lark’s Head Knot

    The lark’s head knot is one of the first types of knot that beginners often learn. It is used to attach cords to a dowel or ring.

    The lark’s head is often used in wall hangings, plant hangers, keyrings, and hanging decorations.

    To make this knot, you fold the cord in half, place the loop over or under your support, then pull the loose ends through the loop.

    Whilst it’s more of a starting knot than a proper decorative knot, it’s still important to be able to hold things in place.

    Square Knot

    Square knots are one of the most fundamental knots used in macramé. They are strong and simple yet still decorative.

    Square knots are made out of four cords. The two middle cords stay in the centre, whilst the other two cords wrap around them.

    Square knots are great for plant and wall hangers, bracelets, bag straps, keyrings, and decorative panels.

    Half Square Knot

    A half square knot is made from the first half of a square knot. If you repeat the same half knot, the cord will naturally start to twist, creating a spiral effect.

    Half knots are great for creating spiral plant hanger sections, twisted straps, or decorative hanging cords.

    This is a particularly useful knot for beginners, as it can make even a very simple project look more interesting.

    Spiral Knot

    The spiral knot is made by repeating half square knots in the same direction. As you keep making knots, the cord twists into a spiral shape.

    This type of knot is often used in plant hangers because it adds nice decoration to the long hanging sections.

    A spiral knot can be a great choice for plant hangers, hanging shelves, key chains, and straps.

    Half Hitch Knot

    A half hitch is a simple knot that is made by looping one cord around another. Whilst it can be used alone, it is more often used in a double half hitch knot (detailed below).

    Half hitches are great for lines, curves, diagonal patterns, borders, and shaped sections. Whilst it’s more fiddly to do than a square knot, beginners can definitely master it with some practice.

    Double Half Hitch Knot

    The double half hitch is one of the most useful macramé knots for making lines and shapes. It is made by tying two half hitch knots around a guide cord.

    This knot is most often used to make diagonal shapes, V shapes, diamonds, leaf shapes, borders, and wall hanging patterns.

    The guide cord controls the direction of the line. If you hold the guide cord diagonally then the knots will form in a diagonal row. If you hold it horizontally, they will form a horizontal row instead.

    Once you are comfortable making square knots first, the double half hitch is a very useful knot to learn.

    Gathering Knot

    A gathering knot is used to wrap several knots together. It’s often used at the top or bottom of plant hangers.

    To tie this knot, you use a separate cord to wrap around a group of cords, and then tuck the end away so that it looks neat.

    Gathering knots can be useful for things such as plant hangers, tassels, finishing off projects and grouping cords together. Is knot is an excellent way to make pieces look more finished.

    Final Thoughts

    Macramé may seem like a complicated hobby but it’s important to realise that most beginner projects are actually made out of a small set of basic knots. Once you learn the lark’s head, square, half square, spiral, half hitch, double half hitch, and gathering knot, you can make interesting beginner projects with confidence.

  • What is Diamond Painting? A Beginner’s Guide

    What is Diamond Painting? A Beginner’s Guide

    Diamond painting is a craft where you place small resin pieces onto a sticky canvas to create a design. The pieces of resin are referred to as ‘diamonds’, even though they aren’t real jewels!

    This craft is a bit like a combination of cross stitch, painting by numbers and mosaic art. Instead of threading or painting the canvas, you attach the diamonds to it onto the canvas in a pre-determined pattern. In this way, it’s closest to stamped cross stitch.

    How Does Diamond Painting Work?

    In order to diamond paint, you start by pouring your diamonds, also known as ‘drills’, onto a tray. You then pick these up using a pen that is dipped in wax to pick up each drill. You can then place the piece in the relevant place on the canvas, where it sticks down.

    Is Diamond Painting Good For Beginners?

    Yes, this can be a suitable craft for beginners. Other than using the wax and pen, you don’t need to learn any particular techniques or have artistic ability like you would for painting or drawing.

    Diamond painting can be a relaxing hobby as its fairly simple to follow along with the steps until you have a completed pattern or picture.

    What Do You Need For Diamond Painting?

    Most beginners start off with a diamond painting kit. This can include items such as:

    • A sticky, printed on canvas
    • Coloured drills
    • Diamond painting pen
    • Wax
    • Sorting tray
    • Small bags for the drills

    If your kit has lots of colours, you may consider investing in extra storage. However, for most people, this is not necessary at the very beginning.

    What Can You Make With Diamond Painting?

    Diamond painting can be used to make decorative pieces to display in your home. Designs you can follow often include animals, flowers, landscapes, patterns, fantasy art, or personalised images.

    Is Diamond Painting Messy?

    Provided the drills don’t get everywhere, diamond painting is a fairly low mess hobby.

    In order to ensure that you don’t lose or mix up your drills, you can keep each colour in a separate pot whilst you work. Also ensure that you pour your drills onto a tray, rather than a table, to keep them together!

    Who Might Enjoy Diamond Painting?

    Diamond painting may be suitable for people who like quiet, detailed crafts that don’t need much space. It can be a great choice if you enjoy patterns, cross stitch, painting by numbers, or other craft kits.

    If you have ever done sequin by numbers, diamond painting is very similar.

    Final Thoughts

    Diamond painting is a simple craft where you create a picture by placing small coloured pieces onto a sticky board. It is very beginner friendly and the perfect hobby to follow along with a kit.

    If you want something structured, low mess, and simple to start, diamond painting may be for you.

  • Warhammer Supplies For Beginners: What Do You Actually Need?

    Warhammer Supplies For Beginners: What Do You Actually Need?

    Affiliate Disclosure: This page contains affiliate links. As an Amazon Associate, we earn from qualifying purchases, at no extra cost to you.

    Warhammer can seem very expensive if you are just getting started; you need to assemble an army made up of a number of miniatures. Each of these needs to be painted properly, which involves more tools and supplies. Finally, there is scenery to worry about.

    The good news is that you don’t need every single possible supply to get started. If you are brand new to Warhammer, you can get started by building a few models, painting them and then seeing whether you enjoy the process before you attempt to assemble a whole army!

    What Do You Need to Start Warhammer?

    For a basic setup, you need:

    • A small box of miniatures
    • Clippers to remove the parts from the frame they come attached to
    • Plastic or super glue
    • A hobby knife or a mouldline remover
    • A few colours of acrylic paint
    • One or two paintbrushes
    • A waterpot
    • Kitchen roll or a paper towel
    • A clear workspace
    • Primer (optional)

    This is more than enough to get you started.

    Warhammer Miniatures

    The most essential piece of kit!

    Beginners can start with a small beginner kit, which contains a couple of pieces, or slightly larger kits with enough figures for a mini army.

    Games Workshop, the makers of Warhammer, produce a ‘Getting Started With Warhammer 40K‘ set, which you may want to consider. This kit contains two push-fit models.

    Clippers

    A lot of models come attached to plastic frames, which are called sprues. Using clippers can help you to remove parts more neatly.

    You can twist pieces off the frames, but it often results in the pieces having extra little rough parts attached. In some cases, parts can get damaged this way. Therefore, clippers may be useful even in early stages to get pieces off the sprue cleanly.

    Glue

    Some models don’t require adhesive, as they are what is called ‘push-fit’. That means that a model can be ‘clicked’ together.

    Most of the current kits produced by Warhammer are plastic, so plastic glue is a good option.

    A Mouldline Remover or Hobby Knife

    When you remove parts from the sprue, you may find that there are still little bits left on. These are mould lines and can be removed with a mouldline remover, hobby knife, or sanding stick.

    You don’t need to obsess too much over this, especially at the beginning of your Warhammer journey. Remove anything that is too obvious and leave it at that.

    Paints

    You don’t need lots of colours of paint to get started off. A small beginner paint set could give you:

    • A colour for armour or clothing
    • A dark colour
    • A light colour
    • A metallic colour
    • A skin colour
    • A shade or wash
    • A base colour

    Warhammer’s official line of paints is called Citadel, but you don’t have to use them. The main thing is that you stick with acrylic paints, rather than thicker regular paint, which can cover over small details and go on unevenly.

    Brushes

    You only need a brush or two to get started.

    A basic setup could be:

    • A medium brush for most of your painting.
    • A smaller brush for details.

    You likely don’t need expensive brushes as a beginner, such as sable ones made with kolinsky hair.

    Primer

    Primer helps the paint actually stick to the model. Many hobbyists start with spray primer before painting the base of their figures.

    If you want to get a better finish, primer is worth using. It gives the paint a better surface to grip onto and can make painting later easier. Black, white, and grey primers are popular colour choices.

    Water Pot or Paper Towel

    You just need a pot of water to rinse off your brush and then some kitchen paper or a paper towel to wipe off any excess paint.

    Don’t let the paint dry on the brush or leave the paint brush standing in water for long periods, as both will lead to damage.

    Palette

    A palette gives you a surface for your paint before it goes on the model.

    You can use:

    • A plastic paint palette
    • An old plate (don’t re-use it for food)
    • A tile
    • A homemade wet palette
    • A piece of baking paper over a damp sponge

    A wet palette is useful because it ensures that your paint is kept wetter for longer, but it isn’t absolutely essential for complete beginners.

    A Small Workspace

    You don’t need a dedicated hobby room.

    Instead, a beginner Warhammer set up should be able to fit on a desk, tray, or kitchen table.

    Useful things are:

    • Good light
    • A flat surface
    • Somewhere to keep small parts safe
    • A cutting mat or protective surface
    • A box to store your paints and supplies

    If you are working in a smaller space, it can be helpful to use a tray to keep everything together in one place.

    ‘Nice to Have’ Warhammer Supplies

    You might consider purchasing some of the following in time, but you don’t need them straight away:

    • A cutting mat
    • Better brushes
    • Spray primer
    • A wet palette
    • Painting handle
    • A model storage case
    • Basing materials
    • A desk lamp

    What Should Beginners Avoid Buying Too Early?

    Early on, you can skip:

    • A full army straight away
    • Every colour of paint
    • Expensive brushes
    • Large terrain kits
    • Advanced basing materials
    • Lots of rulebooks

    It’s true that Warhammer can get very expensive very quickly if you let it, but it doesn’t have to be that way.

    The Simplest Beginner Warhammer Setup

    If you want the smallest setup possible, you can start with:

    • One small Warhammer model set
    • Clippers
    • Plastic glue
    • A starter paint set
    • One or two brushes
    • Water pot
    • Paper towel
    • Primer (optional)

    Some Final Thoughts

    The best Warhammer set up is something that allows you to try out the hobby. You don’t need to start too big or get overwhelmed; start small and see if you enjoy it. Only then, consider expanding your figures to build an army.